

After buying a blank floor cloth two years ago, I finally was able to work on it this month.

 I've always wanted to grow herbs, but I don't have a green thumb so I shied away from it. Recently, I took a leap of faith and bought three herbs - rosemary, mint and basil - from the garden store nearby. It's been two weeks and they seem to be thriving despite the lack of direct sunlight. I used some of the basil when I made tuna spread the other day and a few mint leaves for iced tea. I'm excited to use more of these fresh herbs in the coming weeks, especially the basil, which seems to be growing more than the mint. (We were told at the garden store that the mint tends to take over the other plants beside it.)
Looking for the left-handed instructions? If not, read on…
A magic ring is a way to begin crocheting in the round by crocheting over an adjustable loop and then pulling the loop tight. The advantage of the magic ring method (below, right) is that, unlike the regular “chain 2, x single crochet in 2nd chain from hook” method (below, left), there is no hole left in the middle of your starting round.
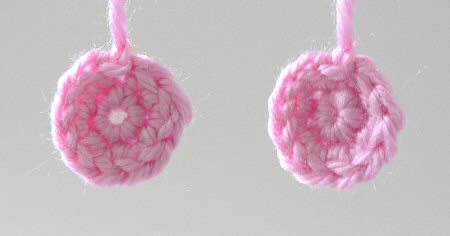
L: ch2, 6 sc in 2nd ch from hook, 2 sc in each st around.
R: magic ring, 6 sc in magic ring, 2 sc in each st around.
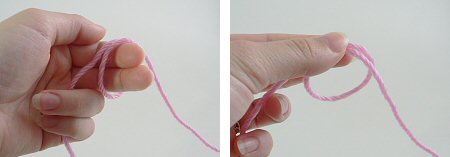
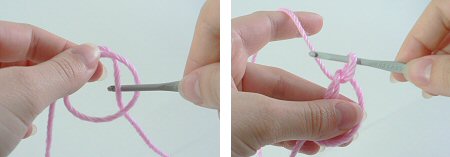
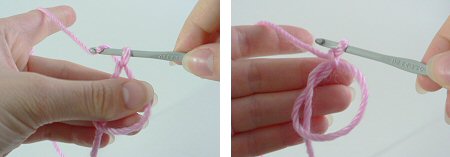
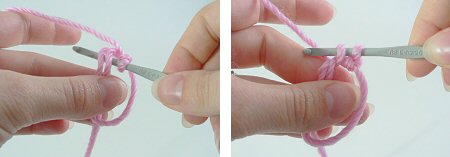
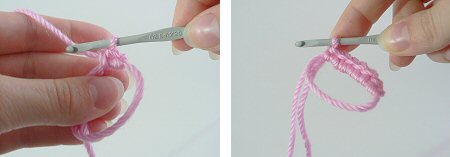
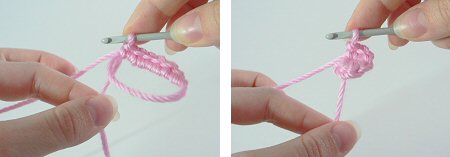
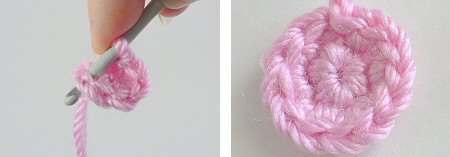
You’ll never go back to your old method again, I promise!
 Make a large loop by putting the yarn tail behind the working yarn (the yarn coming from the skein) (Figures 1-2), leaving at least a six-inch tail until you become familiar with this method (Figure 3). Later, you may leave a shorter tail if desired.


With your hook, draw the working yarn through the loop, so you have one loop on the hook (Figures 4-6).


Ch 3 (counts as first dc) (Figure 7).

 How you hold the loop while you work the stitches into it is personal preference, but I find it convenient to put both my pinky and ring finger inside the loop to hold it tight (Figure 8.)
Dc into the loop, crocheting over the tail (Figure 9).  Continue to work as many dcs as needed for you pattern into the loop. (Don’t forget to keep crocheting over the tail.) When you are finished working stitches into the loop, you will likely find that the tail has curled around the loop a few times (Figure 10). To make it easier to draw the loop closed, first untwist the tail (Figure 11); then pull the tail to draw the loop closed. You can leave an open hole in the center (Figure 12) or draw it closed very tightly (Figure 13).


