
Tuesday, December 27, 2011
My version of Shalom Sweater
Thursday, December 15, 2011
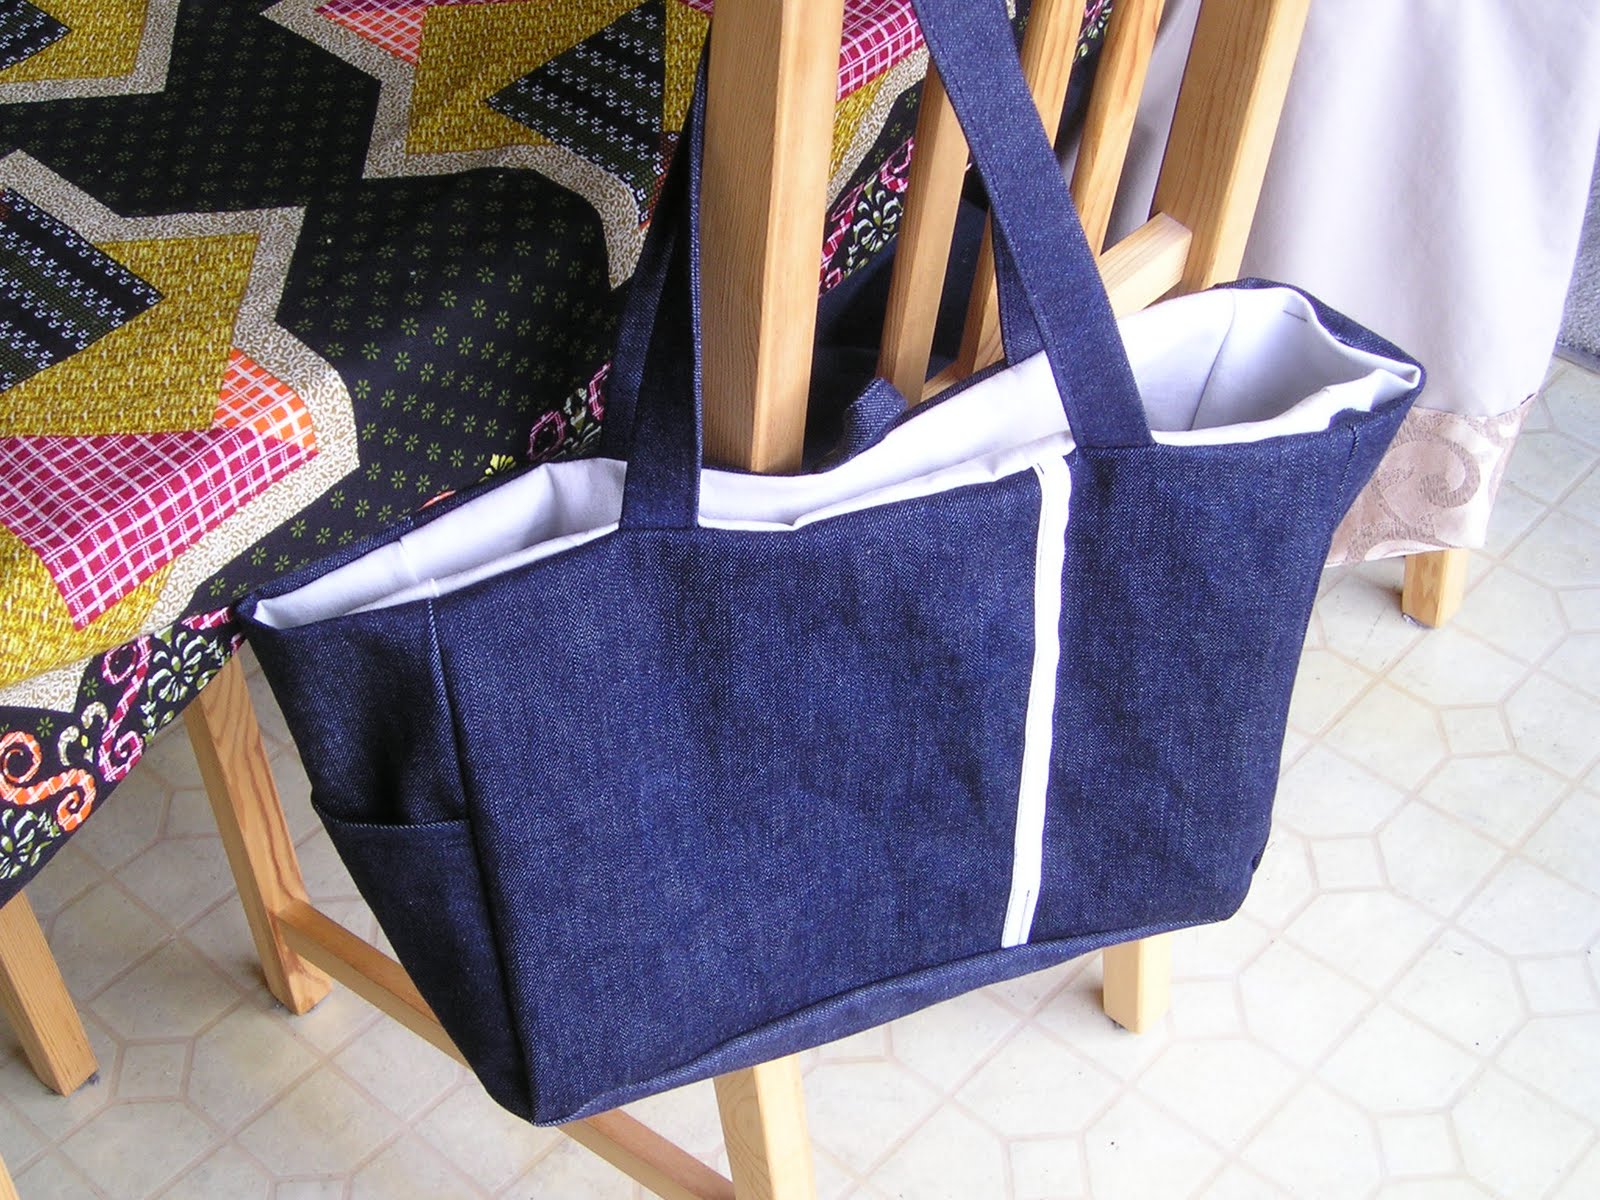
Easy Drawstring Bag
 |
| Drawstring bags made from end-of-the-roll fabrics. |
Saturday, December 10, 2011
Friday, December 09, 2011
Saturday, November 26, 2011
Saturday, November 12, 2011

Sunday, September 04, 2011
How to Make a Ruffle Tank Top with Crochet
This is an interesting way of adding details to the basic tank. I'd probably do something else as I'm not a fan of ruffles.
Many yarncrafters face the same challenge every summer: “I want to make something to wear right now even though it’s warm outside.” I have had this issue on my mind all summer long. On a recent shopping trip I finally found my summer yarncrafting inspiration. I’d like to share with you what I made, and what I learned in the process.
Recently, while admiring racks of ornate summer tank tops, I noticed little ruffles or motifs all over my favorite pieces. I realized then that little details are the perfect way to incorporate crafting into any summer wardrobe. I decided that my first project would be to add a sparkling ruffle in Vanna’s Glamour to an otherwise ordinary tank top.
After stitching the ruffle to the border and weaving in the ends, my
tank top was ready to go! I really love the way it turned out, and
figuring out how to do it was half the fun.
Many yarncrafters face the same challenge every summer: “I want to make something to wear right now even though it’s warm outside.” I have had this issue on my mind all summer long. On a recent shopping trip I finally found my summer yarncrafting inspiration. I’d like to share with you what I made, and what I learned in the process.
Recently, while admiring racks of ornate summer tank tops, I noticed little ruffles or motifs all over my favorite pieces. I realized then that little details are the perfect way to incorporate crafting into any summer wardrobe. I decided that my first project would be to add a sparkling ruffle in Vanna’s Glamour to an otherwise ordinary tank top.
 |
First, I used a slender tapestry needle to Blanket Stitch a border all the way around the neck of the tank top. I used Blanket Stitch because it creates loops along the edge of the fabric without adding bulk. | |
 |
Next, I worked Slip Stitch crochet into the border I had made, using the edge loops as my foundation row instead of a chain. This is a great method for adding crochet trim to different fabrics. |  |
 |
After I completed the border, I was ready to get started on the ruffle. Instead of writing a ruffle pattern from scratch, I followed the directions for the Potato Chip Scarf with a few alterations. I made a chain of 40 stitches (instead of 143), and used a single strand of Vanna’s Glamour with a size H8 hook. Crocheting the ruffle separately made the project a lot easier to manage, and helped me obtain the gauge I wanted. |
Pajama Pattern and How-To
I am almost done sewing my son's pajamas from Weekend Sewing by Heather Ross. In case that pattern doesn't pan out, here's another one I can use.
Saturday, September 03, 2011
Sewing Buttons on Knits
I am ready to sew a button on the Shalom Cardigan, so this tutorial is going to be handy.
What I like to do first is find the position for the button by closing the garment, lining up button band and buttonhole band just where I want 'em. Then, I mark the spot with my needle and thread by making a first stitch on the far side of the garment through the buttonhole.
You'll notice I've got my thread doubled and knotted at the far end.
This makes sewing on the button faster (twice as strong with fewer
passes!) and gives me an easy way to secure the first stitch, rather
than having to make a knot. You instead attach the thread by looping the
needle through the loop created by the doubled thread.
Now I’m ready for the button and slide it onto the needle and thread.
(While I like these colors together, I chose them mainly for
visibility; usually I match thread color closely to either the button
or yarn color, depending on the desired effect.)
Now for the sewing: Go through the back of the button band, then back up and through the button three or four times, not too tightly. Make sure to go around both "legs" of one knit stitch to help your button lie flat and avoid pulling too much on one strand of yarn; this can distend your stitch
Tip: If you just can't avoid tightening up, try putting a toothpick
or slim DPN or crochet hook between button and garment, then slip it out
before the next step. The next step? Bring the needle back through the
garment to the space between the garment and button.
Wrap the thread around the sewing, creating a shank.
Now pull the needle back down through the shank and wrap it around
the shank crosswise. I like to do this three or four times to assure
security.
Pull the thread to the back of the button band and tie a knot—again, I tend to wrap and knot a few times.
Now you can snip the thread and you’re done!
You shouldn’t have any buttons falling off your hand-knit garments
again. You might still avoid buttons on some baby items, especially if
the mom is the obsessive type—being a mom’s hard enough, and babies are
pretty much cute as a proverbial button without the actual thing getting
in the way.
What I like to do first is find the position for the button by closing the garment, lining up button band and buttonhole band just where I want 'em. Then, I mark the spot with my needle and thread by making a first stitch on the far side of the garment through the buttonhole.
 |
Place the first stitch to get the button in the right spot. |
 |
Secure the thread by pulling the needle through the doubled thread loop. |
 |
Slide the button into place. |
Now for the sewing: Go through the back of the button band, then back up and through the button three or four times, not too tightly. Make sure to go around both "legs" of one knit stitch to help your button lie flat and avoid pulling too much on one strand of yarn; this can distend your stitch
 |
On the back of the button band, give your button a wide base to help it lie flat and to protect your knitted garment. |
 |
Bring the needle up between the garment and button. |
 |
Wrap the thread around the "legs" created by your sewing. |
 |
Secure the thread around the shank. |
 |
Knot the thread. |
 |
Finished and all buttoned up. |
Knitted Cuffs
In between sewing, I have managed to complete a knitted cardigan (photo to follow) that I tweaked by adding crocheted 3/4 sleeves and am now working on a cuff from leftover stretch cotton yarns. The cuff patterns were found on Knitty. I hope to knit a few more during my plane trip in a couple of weeks.
Saturday, August 13, 2011
How to Sew a Dart
Before sewing my first dress, I've been reading a lot before even cutting the fabric.
Saturday, August 06, 2011
How to Sew Easy Kimono Dress Pattern
I'm ready to take the plunge so this might be a good tutorial to follow.
I'm going to make a simple shift dress.
I'm going to make a simple shift dress.
Monday, August 01, 2011
Tote Bag with Zipper

After weeks of struggling with zippers, I finally finished the tote bag with zipper today. I used a pattern based on the All-Day Tote Bag. I tweaked the pattern a little by changing the position of the front pocket and extending the length of the side pocket so it can house an umbrella comfortably, but alas I did not make the length of both pockets match. Oh well.
I wanted to add a zipper and tried unsuccessfully two or three times to make an extended zipper based on a book and a blog, but it wouldn't work. I was about to give up when I chanced upon this book at the library that had a simple zipper tote bag pattern. So now, not only does this new bag have a zipper, my tote bag has one, too!

Wednesday, June 29, 2011
Repurposing Sweater
http://tipnut.com/make-sweaters/
http://www.onepearlbutton.com/2008/11/recycled-luxury-sweater-to-long-mittens.html
http://vintageindie.typepad.com/vintage_indie/2010/03/what-you-make-of-it-felt-fun-repurposing-a-sweater-with-susan-duane.html
http://craftingagreenworld.com/2009/05/18/think-outside-the-fabric-box-how-to-sew-with-knitted-or-crocheted-fabrics/
http://resweater.blogspot.com/
Friday, June 17, 2011
Shalom Sweater
Sunday, May 08, 2011
Internal Zipper Pocket tutorial
http://www.craftpassion.com/2010/04/sewing-tutorial-internal-zipper-pocket-for-bag.html
Sunday, May 01, 2011
All-Day Tote Bag

Here's my second tote bag, based on the pattern by Lotta Jansdotter. The bag is kind of floppy, so next time, I would like to add interfacing. It's not completely done yet, as I still have to add a button and sew one side, but I'm getting there. I can't wait to make another one.
Update: I added interfacing and a button. The bag looks better, but not yet perfect. I'm going to bring it to work tomorrow and see how it fares.
Lady's mantle

Last year, I got a sprig of lady's mantle (names afte r the Virgin Mary's cloak because of its scalloped leaves) and fell in love with it so I kept the name of the plant on my list of things I wanted to grow this year. Today, I was planning to stay home as I had a long list of things to do, but the gorgeous weather was calling out to me. I thought of going for a walk to the garden centre, and true enough the store was full of people wanting to buy plants for their gardens. With this kind of weather, who wouldn't? I was ecstatic to finally see that they got their delivery of lady's mantle. (They didn't have it two weeks ago when I visited.)
Monday, April 18, 2011
How to Make Mitered Corners
It took me several tries before I could make perfect mitered corners and the directions from Martha Stewart's Encyclopedia of Sewing and Fabric Crafts is the easiest one to follow.
Once you've mastered the basic skills required, you can apply them to making napkins and tablecloths with mitered corners.
- Press 2 folds into each side of the fabric square; the first fold is 1/2 inch wide; the second is 1 inch. Unfold the second crease. Fold one corner in so the second crease lines up. Press.
- Unfold the corner, and refold on a diagonal with right sides together. Stitch along the crease made b the folded corner. Repeat with the remaining corners.
- Trim the points from the corners to 1/4 inch, tapering. Press the seams open and the corners flat.
- Turn all 4 corners inside out (which is actually right-side out); press again.
- Stitch down the fold all the way around so you have a seam 1 inch from the edges.
Tote Bag

I sewed my first tote bag the other day, based on this pattern. I tweaked the pattern a little by squaring the bottom of the bag - see below (taken from this link from CraftyDaisies, which has the best tutorial for squaring bags).
How to Square Bags
August 24th, 2007 by Jen LoveI had been asked by several to explain what I meant by the term “gussetting” in several of my former projects. It’s one of those techniques that is difficult to describe in words but is really easy to do! I promise if you try this quick tutorial it will change the way you sew, especially the way you make bags!
1. For my example I made a small pouch by folding my fabric in the middle (right sides together) to make the bottom of my bag, and sewing up the right and left sides.
2. Then at one of the corners I put my hand inside of the bag in order to flatten it in the opposite direction.

3. Now you are looking at the end of your bag and it should look like a triangle. Center your seam between the other 2 sides of the triangle and measure down from the peak the measurement of half the width you want the bottom to be when finished. Not hard math- 1 1/2″ if you want a 3″ wide bottom…it will depend on the size of your bag.
4. Using ruler, mark with pencil or chalk a vertical line across your “triangle”. This the line that you sew your seam across.

5. Repeat for the right and left sides of the bag. This is also how you could make ears on hats for kids, but by sewing on the right side of the fabric.

6. When you turn the bag inside out it will have 2 square sides. Cover cardboard and add to the bottom to make your bag sturdy. This same technique can also be used on knitted bags, which is were I first learned to gusset.

Saturday, March 26, 2011
How Twitter made handwriting cool
I love writing letters
How Twitter made handwriting cool
From the rise of 'journalling' to the world's greatest pencil, notes are now in vogue
Wohlgefühl: it’s one of those enigmatic words the German language excels in constructing. It can mean ‘wellbeing’ or ‘good feeling’, but it is the word Meike Wander, owner of Berlin’s RSVP stationery shop, uses to describe the timelessly simple delight of handwriting: of pen in hand, ink on paper and skin on surface as thoughts and images transfer from the imaginative to the material.
‘It’s a physical experience, it’s your body doing something,’ Wander says in her hesitant English. ‘Handwriting produces a good feeling – a wohlgefühl.’
The atmosphere in the pine-floored showroom is still and studious, like a place devoted to patience and craft. Displayed on the shelves are jotters, cahiers, journals, diaries and notebooks from all around the world – the rare Mead composition pads, yellow Cambridge block legal jotters, anonymous classroom books by the Korean brand O Check, and bijoux Caderno notebooks by Serrote, a press who reissue classic Portuguese school pads in limited-edition runs.
There are the distinctive black and orange Bloc No13 pads by the French brand Rhodia, and rows of Italian Moleskines in every format, size and colour, from black A5 journals with elastic fasteners to city-break guidebooks and tiny pocket-sized notebooks in pretty pinks, greens and blues (popular with girls, apparently).
Then, there are shelves of elementary writing instruments offered not for the status they impart, but simply for being items that are really good at what they do: attractive little boxes of coloured Kaweco ink cartouches, chunky brass M&R pencil sharpeners and colourful Caran d’Ache 849 ballpoints.
Wander opened the shop eight years ago, she says, ‘for no logical reason’. ‘I’m like most of my customers: I can’t pass a stationery shop. I always have to go in and touch everything. I love the tactility of paper and different surfaces.’
For such rational, rudimentary and often downright plain products, stationery can exert a powerfully emotional pull. Shoppers at RSVP tend to be devoted stationery fetishists – apparently customers rush into the shop and grab an armload of Cambridge pads for fear of never finding them again.
Yet even for less engaged customers, the simple utilitarian beauty of RSVP’s stock is enough to make anyone renounce the iPad, find somewhere furtive, and just sit and think and extemporise on whatever happens to arrive: notes, thoughts and memories, letters to loved ones, diary entries and reflections upon sights and events, or just scribbled to-dos.
Paper, pens and pencils may scarcely seem like aspirational items – they are often more redolent of the agonies of the classroom than anything else. But if there is a halo around handwriting, its tools, techniques and joys, it would only make sense today; handwriting and notebooking is a trend where austerity meets posterity.Writing is cheap and simple, and won’t get lost if your laptop crashes.
There’s even a new word for the urge to scribble that shops like RSVP and brands like Moleskine sell to: ‘journaling’. In an age dominated by the dizzying proliferation of digital communications, of iPhones, iPads, BlackBerrys, Twitter, Facebook, email, SMS and hundreds of other technologies, the simplicity of pen and paper suddenly commands a timeless attraction.
Ancient communication technologies are current like never before. Boutique stationers like RSVP and The Paperie in Chester are thriving: people haven’t stopped handwriting today any more than they eat lunch in pill form or commute to work in electric maglev cars.
The long, slow decline of penmanship is often lamented, and not without reason. A 2006 report published by the Institute of Education termed handwriting the neglected, ‘Cinderella skill’ of literacy. The ability to handwrite legibly, the report said, ‘is essential for everyone even in this age of computer technology’.
According to Angela Webb of the National Handwriting Association, there was once no formal education policy on handwriting for schools. For the past seven years, however, handwriting has been part of the national literacy strategy. Far from dying out, she argues, handwriting is resurgent.
‘We’ve seen a reverse of the trend in the last two to three years, and people are much more keen to handwrite now. Research is coming though from skilled authors who use handwriting to get ideas flowing and then move to the keyboard to develop them.’
Patricia Lovett, a judge on the National Schools Handwriting Competition, says she is constantly surprised by the popularity of handwriting among schoolchildren and, at the same time, she notes a resurgence of interest in handwriting that chimes with other craft-based hobbies and manual pursuits.
‘There is every parallel in the importance of handwriting, and hand writing well, with the Slow Food movement, heritage crafts, after-school knitting and craft clubs,’ she says. ‘There are things in life which have to be taught and learnt, but are worth doing, and worth doing well.’
While some were surprised that Tony Blair handwrote his recent memoir, he is far from alone in authoring longform texts by hand: James Ellroy, JK Rowling and John le Carré all write by hand, as does a promising, computer-shunning novelist named Dawn French.
‘Something handwritten shows that you care and that it is important to you,’ Lovett argues. ‘And, may I say, nothing beats the pleasure of being able to actually tick something off a list by hand rather than it simply disappearing from a screen because it has been done.’
Sales figures in the growing notebook market tell their own inky tale. According to Moleskine’s creative director Maria Sebregondi, the Italian-owned brand of oilskin notebooks, famously popularised by Bruce Chatwin from its Rive Gauche roots, sold 12 million journals in 2009 and expects to sell 14 million this year.
The company has attracted criticism in the past for claiming unverified associations with literary and artistic greats (Hemingway and Picasso among them), yet there is no denying that since the mid-Nineties, Moleskine has pioneered a market for covetable, carryable stationery.
They inspire profound devotion, yet the humble notebook is as far from ostentation as it gets. While Old Bond Street’s Smythson position stationery as a luxury item – time to reflect and consider is a luxury in itself today – the popularity of Moleskine and the lines offered by RSVP suggest the real contemporary fetish is for simple, functional and enduring products that haven’t changed in a long time.
‘We want our customers to perceive notebooks as everyday objects, not something impenetrable or demanding,’ Sebregondi says. ‘Notebooks are not luxuries but cultural items – culture is always inclusive, while luxury is exclusive. That’s the difference.’
And in positioning the cahier as ‘a book yet to be written’, Moleskine tapped a modern aspiration towards creativity; they might not make you be creative, but they certainly make you feel creative. Today the company offers 300 different notebooks, cahiers, folios and diaries, while last year they caused a splash by launching a range of candy-coloured ‘volant’ pocket carnets.
And après Moleskine, le déluge. According to Angela Young of The Paperie, more and more entrepreneurs are spotting an opportunity to expand the market and offer innovative stationery products. ‘The renewed interest in journaling and notemaking is driven by people’s desire to use pen and paper,’ she says. ‘We use computers and mobile phones so much these days, and I believe that people don’t always want to be looking at an electronic screen. They want to be hands-on and connect with what they are writing.’
Young mentions Field Notes, a popular new American brand offering pocket notebooks in proletarian brown card covers, inspired by postwar American agricultural memo books and attractively reminiscent of ration books. Field Notes’ corporate blurb makes the delightfully prosaic claim that they offer ‘an honest memo book, worth filling up with good information’.
Stuart Kirby, of the British company JOTTRR, offers notebooks with radiused, numbered pages, alternately lined and blank, plus perforated, pull-out grid leaves and elastic fasteners with yellow, fuchsia or black covers. JOTTRRs have been ‘flying off the shelves’ according to Young.
For Kirby, a self-confessed hard-core notebook user, they are the chance to capture something in a different way. Rather than diminishing the importance of the notebook, he says, digital has enhanced it.
‘In the digital age there is so much information, but using notebooks is a very different process to writing on a screen – you go back over notes, cross things out, amend and review. You remember it,’ Kirby says. Indeed, there are endless scientific studies proving that taking the time to form a letter - instead of just hitting a key – – promotes neural activity, creativity, memory and fine motor skills.
Just as they can be particular in their choice of paper, stationery fetishists can be exacting about their pencils. But from the mundane to the exotic, the tools of writing have not radically changed over the years.
With the exception of mechanical pencils, which ratchet leads through a plastic case, the pencil in particular remains fundamentally the same: a shaft of graphite encased in two semi-hexagonal sections of aromatic incense cedar. Yet on the internet, these utilitarian tools inspire a devotion bordering on the obsessional (try the Dave’s Mechanical Pencils blog for everything you never knew there was to know about pencils).
A few years ago, a number of pencil bloggers announced that the discontinued Eberhard-Faber Blackwing 602 was, not to put too fine a point on it, the greatest pencil ever. A sleek black object with an oversized ferrule (eraser holder) and the charismatic epithet, ‘half the pressure, twice the speed’ embossed on its shaft, it was declared ‘the world’s best pencil’ by American author Joseph Finder.
The Blackwing’s claim to perfection and authenticity was sealed after a character was seen using one in Mad Men, and to tremendous applause from pencil devotees around the world, an American company, CalCedar, recently reissued and renamed the product as the Palomino Blackwing.
The world’s greatest pencil is back. According to John F Gamber, editor of the Pencil Revolution blog, the new Blackwing is ‘one of the darkest and smoothest pencils I ever used. The graphite core is unreal.’
Amateurs take a professional interest in artistic tools and techniques today, and if you doubt that, try asking a professional. British artist Stephen Walter pencil-draws huge, intricate city maps overlaid with microscopically detailed handlettering of street names, cartographic symbols and his own subjective, psychogeographic impressions.
His work featured in the British Library’s recent Magnificent Maps exhibition, while his studio is festooned with the detritus of creative practice: his laptop sits aside Moleskines, piles of Post-its and A4 notes cascading off the table, and Sellotaped to walls are the sketches, details, scribbles, sentences, thoughts and ‘workings-out’ that eventually coalesce into his mesmerising, forensically elaborate maps.
Walter is an aficionado of the Staedtler Mars Lumograph in gradiations from H9 down to 2Bm. His studio houses hundreds of them, sharpened, blunted, chewed, snapped, unused or worked down to a stub.
The appeal of pencil, he says, ‘is the friction and rawness of it. You’ve got a chunk of base material from the inside of a mountain and the trail it leaves on paper – I like that directness.’
Notebookers and stationery fetishists stand firmly on one side of a modern social divide, representing intimacy and privacy; on the other side is the compulsive self-exposure of social networking, commenting and blogging. More reflective and considered than the digital diarrhoea of status updates, comments and tweets, less coldly perfunctory than emails and texts pecked out on an iPhone, iPad or BlackBerry, the vogue for notemaking returns writing to an act of expression instead of communication.
One question remains: what to write on those intimidatingly blank pages? Well, it’s up to you.
Websites even a stationery fiend will love:
www.thepaperie.co.uk
www.bureaudirect.co.uk
www.jottrr.com
www.moleskine.com
www.stephenwalter.co.uk
www.rsvp-berlin.de
www.fieldnotesbrand.com
www.scoutbooks.com
www.nha-handwriting.org.uk
www.pencilrevolution.com
Saturday, March 12, 2011
Double-Turn Hemming
Here's a tutorial on how to make a simple hem from Sew4Home.
The first thing to do is determine how big a hem you need to get the finished length you want.
Most people prefer to err on the side of narrow over wide so there's less bulk to the folded fabric and the hem will lay nice and flat. In fact, it's often better to trim your fabric just a bit rather than make a giant hem.
Large
Let's say you have 2" to work with for the bottom of a curtain. First, fold in your raw edge ¾" and press. Then, make another fold 1¼". Your first fold rolls inside the second and you end up with a nice folded edge on both the top and bottom. Press this double fold and stitch down, sewing close to the fold in the fabric.
Medium
Perhaps you'd like a narrower option for the edge of a pillow back opening or the bottom of a table cloth. In this case fold under ½" and press. Then fold under an additional 1½" and press. As above, stitch the hem down, sewing close to the fold in the fabric.
Small
Sometimes, you need a tiny hem for something like a napkin edge. In this case, your double-turn should be just ¼" to start and then a second ¼" to finish. This is also called a "rolled hem" and on many machines you have a presser foot called, unusually enough, a Rolled Hem foot to help you do the job. This specialty foot comes standard on many machines, like the Janome models we recommend at Sew4Home, or you can purchase it separately.
Sunday, March 06, 2011
How to Draw the Bobbin Thread
I struggled with this a few times, but I think I'm getting the hang of it. Here's a good pictorial from Brother.
| 1. | Pass the thread along the slit in the direction of the arrow, and leave it there without cutting it. |
|
| |
| The bobbin cover should still be removed.
| |
| 2. | Raise the presser foot using the presser foot lever. |
|
| |
| 3. | Lightly hold the end of the upper thread. |
|
| |
| 4. | While holding the end of the upper thread, raise the needle either by turning the handwheel toward you (counterclockwise) so that the mark on the wheel points up or by pressing needle position button (for models equipped with the needle position button) once or twice. |
 | |
|
| |
| 5. | Pull on the upper thread to draw up the lower thread. |
 | |
|
| |
| 6. | Pull out about 10 cm (4 inch) of both threads and pull them toward the back of the machine under the presser foot. |
 | |
|
| |
| 7. | Replace the bobbin cover. |
 |


 Presser foot lever
 Upper thread
 Mark on the handwheel
  Needle position button
 Upper thread
  Lower thread
 Upper thread
  Lower thread
Saturday, March 05, 2011
WIP: Knitted Scarf

I'm not done with knitting yet, despite my newfound love for sewing. I am almost done with this lovely scarf made of alpaca yarn.
Table Napkin

Here's a photo of my first sewing project. It's not perfect, but my next one should be better than this.
Sunday, February 27, 2011
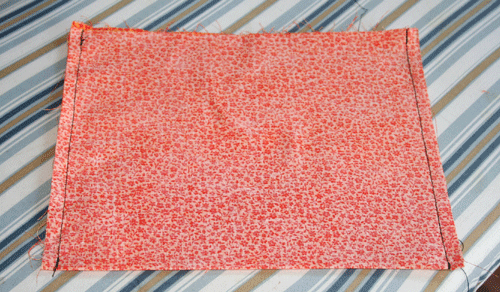
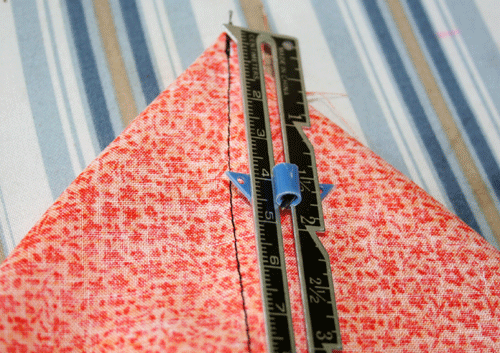
Mitered Corners Redux
This tutorial from Sew4Home gives very good instructions and I thought this was finally the one that was going to work for my project. But like the first ones I tried, I realized this technique would work only if the sides have been hemmed, as opposed to the raw edges I have.
This sample was made for our Citrus Holiday napkin project, but you can use it anytime you need a narrow hemmed corner.
- Along all edges, turn right side under ¼" and press well.
- Turn another ¼" all around and press well.
- Unfold both ¼" turns so your fabric lays flat. You should be able to see the fold lines of both turns.

- Fold the corner at a 45˚ angle so the point of the corner lines up with the intersection of the second set of fold lines. Press.

- Fold corner a second time, again at a 45˚ angle. Press.

- Re-fold your first ¼" turn along its original fold line and press well.

- Refold along your second ¼" fold line and press. If you've been careful with your measurements, turns and pressing, this second re-fold will create a diagonal line where your two finished edged meet, making a neat split corner.

- Edgestitch around all folded edges, back-tacking two to three stitches at each corner. Make sure your back-tacking crosses over the split corner to help this split say closed.

- Press from the front to finish.


Subscribe to:
Posts (Atom)