Link to tutorial.
Thursday, September 13, 2012
Pillow Mattress
http://southerndisposition.blogspot.ca/2011/06/pillow-bed-tutorial.html


She found it on pinterest and thought I would like it. Welllll....she was right. Not only do I like it, but I could see an immediate need for one (why is it that you don't know you need something until you see it?). Since the one in the photo above is somewhere in England right now retailing for approximately $145 plus shipping...you know the rest, right? I'm super cheap.
If you'd like to pay $145 for it, you can get it here. If you'd like to make it yourself for a sliver of the cost, please see below:
First, I went to IKEA - here's my entire haul...one twin size duvet cover and five pillows.

The duvet cover was $9.99 and the pillows were $0.99 each (yes, you read that correctly). Total cost of this project? $14.94!! Who just saved 90%? I keep telling Eric I'm saving money, and he keeps asking me, "by buying things??" This is what marriage is all about, friends.
Step 1:
Measure. I eyeballed everything - I didn't even pull my tape measure out on this project. I liken this to my grandmother rationing ingredients at dinner...I don't know if she even owned measuring cups, but somehow the food was always delicious.
Here's how I measured:

Yep..."four pillows long" looks about right.
Step 2:
Cut the duvet cover to the desired width. Again, I eyeballed it based on the size of the pillows:

I ended up cutting the duvet cover exactly in half. Do you know what that means? I'll tell you what that means: it means that I have another pillow mattress just waiting for me to make it (it's probably going to wait a while).
Step 3:
Cut the top half of the duvet cover lengthwise so that the bottom edge sticks out a few inches further - like so:

The longer edge will fold under to make a pocket (so that you can't see the pillows when they're in the cover).
Step 4:
Hem all raw edges.

This was the longest step and it probably took 15 minutes.
Step 5:
Make the pocket. Fold the long edge (from step 3) inside under the short edge. I turned the entire cover inside out, folded the long edge, and then sewed up the sides width-wise (made about a 3" stitch at the top and the bottom of the cover).

Once I turned it right-side-in, the pocket was tucked neatly under the short side so that you couldn't see it. The widths of the long side and the short side match now (so I guess they aren't exactly "long" and "short" anymore).
Step 6:
Divide the cover into quarters by sewing three lines across the width.

This will make the "pillow cases."
Step 7:
Insert pillows:

Et Voila...a Pillow Mattress!
Here it is in it's new home, the "Princess Fort"

And here it is being used by the princess herself:
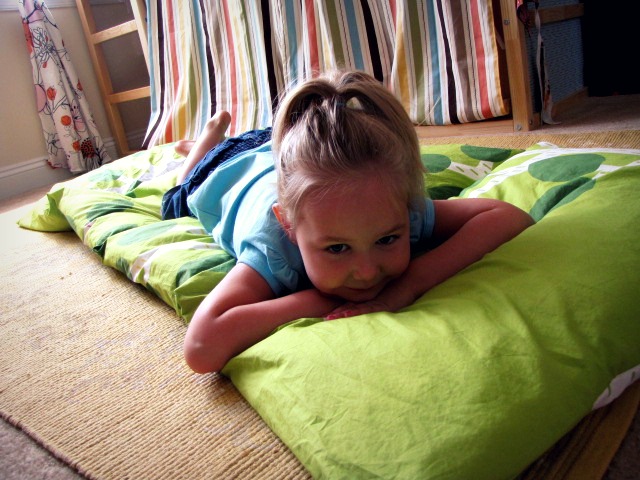
Really easy project - time commitment is about 45 minutes, and the pillows and cover are washable!
Happy sewing!
PS - here are the products used in the "Princess Fort." Enjoy!
Twofold Scarf to Make
http://southerndisposition.blogspot.ca/2011/11/anthropologie-lucia-loop-knockoff.html
I wanted the Anthropologie Lucia Loop, but it's $78. Seven. Eight. Too much for a scarf, n'est-ce pas?


I wanted the Anthropologie Lucia Loop, but it's $78. Seven. Eight. Too much for a scarf, n'est-ce pas?

It's beautiful, but it's not worth $78.
Enter tutorial.
Step 1: Cut two 12"x 60" pieces of silky coordinating fabric (longer for a longer loop, shorter for a shorter loop)

Step 2: Stitch the long sides of the fabric together wrong side out.

Step 3: Flip right side out - you should have a silky tube.
Step 4: Fold the tube so that the short ends are together...you should have FOUR layers of fabric...two of one fabric (on the outside) and two of the other (on the inside):

Step 5: Make sure the existing seams are even and start sewing the TWO INSIDE layers together. Take care to keep the outside layers pushed out of the way so that you don't accidentally stitch over them.

(Notice my thumb and forefinger keeping the bottom layer out of the way of the presser foot). You will continue around the loop until you get to the two outside layers...keep sewing until you can't sew another stitch without making a mess...you'll know when that moment is...
Step 6: Eventually, there won't be any more space to sew, but you'll still have a hole. No prob. Flip your scarf so that the "invisible seams" you just sewed on the short sides are tucked in. You'll have a little hole left like this:

Step 7: Get out a needle and thread, and sew the remaining couple of inches shut.
Once you're done, you'll have your own knockoff Lucia Loop Scarf!

Subscribe to:
Posts (Atom)